 Skip to content
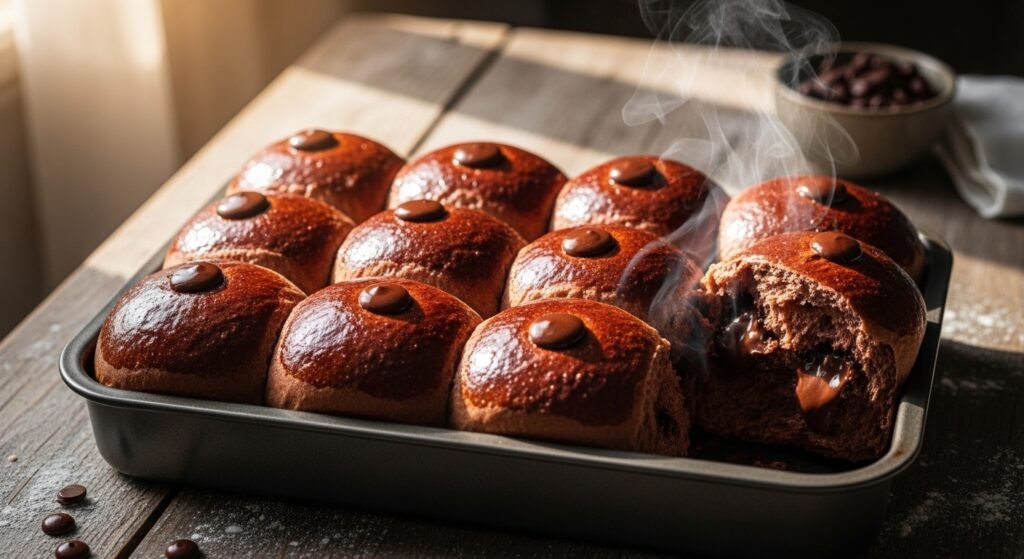
Are you ready to make your kitchen smell like a dream? Making an easy chocolate bun recipe is the best way to spend a rainy afternoon. You do not need to be a pro baker to nail this. We are going to walk through every single step together. By the end, you will have fluffy, chocolatey clouds of joy. Let’s get this dough rolling and make some magic happen.
Introduction to Homemade Chocolate Buns
A classic chocolate bun is basically a hug in bread form. It is a soft, yeast-based roll that feels like a cloud when you bite it. You can make these for breakfast or a late-night snack. They are super versatile and always hit the spot. Having a solid recipe for these in your back pocket is a total game-changer. It makes you the star of every brunch or holiday party.
There is a small difference between a basic bun and an enriched roll. Basic buns focus on a clean cocoa flavor and a simple dough. Enriched rolls often have more butter, eggs, or chocolate chips inside. This guide combines the best of both worlds so you get maximum flavor. You can choose to go with just cocoa or add those melty chocolate drops. Either way, your taste buds are going to thank you big time.
Baking with cocoa powder gives the whole bun a deep, rich color. Adding chocolate chips or drops gives you those amazing melty pockets. When you mix both, you get a double dose of chocolate goodness. It is the ultimate treat for anyone who loves sweets. Plus, making them at home means you control all the good stuff inside. No weird preservatives, just pure, delicious homemade vibes.
Essential Ingredients
Before you start, you need to get your gear and ingredients ready. Precision is the name of the game when you are working with yeast. Using a kitchen scale is way better than using cups. It ensures your bread comes out perfect every single time. Small changes in flour or liquid can change the whole texture. So, let’s look at what you need to grab from the pantry.

Dry Ingredients and Quantities
The dry stuff forms the skeleton of your easy chocolate bun recipe. You want ingredients that provide strength and just the right amount of sweetness.
- Bread Flour or All-Purpose Flour: 250g for a small batch or 500g for a big one. Bread flour gives a better chew.
- Cocoa Powder: 15g of high-quality Dutch-processed or Bensdorp cocoa. This provides that deep chocolate soul.
- Sugar: 30g to 50g of caster or granulated sugar. It feeds the yeast and keeps things sweet.
- Yeast: 4g of instant yeast or 20g of fresh yeast. This is what makes your buns grow big and tall.
- Salt: 3g of fine table salt. Never skip this because it brings out all the other flavors.
Wet Ingredients and Fats
Wet ingredients turn those dry powders into a stretchy, workable dough. Fats like butter and eggs make the bread rich and soft.
- Milk: 130ml to 250ml depending on your batch size. Use whole milk for the best flavor.
- Butter: 35g to 50g of unsalted butter. Make sure it is softened so it mixes in easily.
- Eggs: 1 large egg for the dough. Eggs add structure and a beautiful golden crumb.
- Vegetable Oil: Just a little bit to grease your bowl. This stops the dough from sticking while it grows.
Mix-ins and Toppings
These are the finishing touches that make your buns look and taste professional.
- Chocolate Drops: 80g of semi-sweet or dark chocolate chips. These create melty surprises inside.
- Eggwash Mixture: 1 egg yolk mixed with 1 tablespoon of milk or oat cream. This gives the buns a shiny, dark top.
Preparing the Dough: Step-by-Step
Now it is time to get your hands dirty and make some dough. This is the part where the science of baking turns into art. Take your time and enjoy the process of watching the ingredients transform. If you have a food processor with a dough hook, you can use it. But kneading by hand is also a great way to feel the dough’s progress. Let’s break down the mixing and kneading stages.
Mixing the Base
Start by grabbing your biggest mixing bowl to keep things tidy. You want to make sure the cocoa powder is sifted so there are no lumps.
- Combine Dry Ingredients: Whisk the flour, sifted cocoa, sugar, and yeast together first.
- Add Liquids: Create a small hole in the center and pour in your milk and egg.
- Form a Shaggy Mass: Use a spatula or your hands to mix until the flour is mostly gone.
- Let it Rest: Cover the bowl and let the mix sit for 10 minutes. This helps the flour soak up the liquid.
The Kneading Process

Kneading is how you build strength in the bread so it can hold air. This is what makes your easy chocolate bun recipe turn out fluffy instead of flat.
- Add the Butter: Poke the softened butter into the shaggy dough and start working it in.
- Knead for 10-15 Minutes: Keep going until the dough is smooth and no longer sticks to your hands.
- The Slap and Fold: Pick up the dough, slap it on the counter, and fold it over. This technique is great for sticky chocolate dough.
- Add the Chocolate: If you are using chips, fold them in at the very end. You don’t want to crush them while kneading.
Mastering the Science of Proofing
Proofing is just a fancy word for letting the dough rise. It is the most important step for getting that airy texture. You have to be patient and let the yeast do its job. If the room is cold, it might take a bit longer. If it is hot, the dough will grow like crazy. Just keep an eye on it and look for the visual signs.
The First Rise (Bulk Fermentation)
This is the first long nap for your dough. It needs a warm, draft-free spot to do its thing.
- Grease the Bowl: Rub a little oil in a clean bowl so the dough can slide up the sides.
- Cover it Up: Use a damp cloth or a lid to keep the moisture inside.
- Wait for the Double: Let it sit until it is twice the size it was. This usually takes about an hour.
- The Fold: Gently press the air out and fold the dough over itself. This strengthens the bread and evens out the temperature.
The Second Rise and Smoothing
Some recipes suggest a second quick rise before you start shaping. This helps the flavors develop and makes the dough easier to handle.
- Smooth Surface: Let the dough sit for another 30 to 60 minutes. You will notice the surface looks much smoother and less lumpy.
- Ready to Shape: Once it looks plump and relaxed, you are ready for the next phase.
Shaping and Final Preparation
Shaping is where your buns start to look like real food. You want to be gentle so you don’t squeeze out all the air you just worked for. It helps to have a clean, lightly floured surface ready to go.

Dividing and Pre-shaping
Consistency is key here so all your buns bake at the same time.
- Scale the Dough: Use your scale to divide the dough into 6 or 9 equal pieces.
- Rough Balls: Roll each piece into a loose ball and let them rest on the counter.
- The Bench Rest: Cover the pieces with a towel for 10 minutes. This lets the gluten relax so they don’t spring back when you shape them.
Final Proofing in the Pan

Now you are putting the buns in their final home before they hit the heat.
- Tuck and Roll: Pinch the bottom of each ball to create a tight, smooth top.
- Place in Pan: Put them in a 20×20 cm pan or on a baking sheet with parchment paper.
- The Final Rise: Cover them one last time and let them grow for about an hour.
- The Poke Test: Gently poke a bun with your finger. If the dent stays or pops back slowly, it is ready.
Baking to Perfection
The moment of truth has arrived! Your kitchen is about to smell like a chocolate factory. Baking is all about timing and making sure your oven is actually at the right temperature.
Temperature and Timing
Most ovens need a good 20 minutes to really get hot all the way through.
- Preheat to 180°C: Make sure your oven is at 180°C or 350°F before the buns go in.
- Apply the Eggwash: Gently brush the tops with your egg and milk mix. This creates that shiny, dark finish.
- Bake Time: Set a timer for 15 minutes for smaller buns or up to 25 minutes for larger ones.
Cooling and Post-Bake Care
Resist the urge to eat them the second they come out. They need a minute to set their structure.
- Transfer Quickly: Move the buns to a cooling rack right away. If they stay in the hot pan, the bottoms will get sweaty and soft.
- The Softening: Don’t worry if the tops feel a bit crusty at first. They will soften up as they cool down.
Troubleshooting and Expert Tips
Sometimes things don’t go exactly as planned. Don’t sweat it! Baking is a learning process, and even the “fails” usually taste pretty good. Here are some pro tips to help you troubleshoot your easy chocolate bun recipe.
Temperature Control: The Cold Milk Secret
The temperature of your kitchen changes how the dough acts. If you live in a hot place, your dough might get too warm while you knead it.
- Use Cold Milk: If your kitchen is over 30°C, use cold milk to keep the yeast from moving too fast.
- Warm it Up: If your house is freezing, use lukewarm milk to wake the yeast up.
- Not Too Hot: Never use hot milk, or you will kill the yeast and the bread won’t rise.
The Windowpane Test

This is the best way to tell if you have kneaded the dough enough.
- The Stretch: Take a small piece of dough and gently pull it apart with your fingers.
- The Window: You should be able to see light through it without the dough tearing.
- Fixing Tears: If it rips right away, knead it for another 5 minutes and try again.
Judging Doneness in Dark Dough
It is hard to see if chocolate bread is “golden brown” because it is already dark.
- The Tap: Give the top a gentle tap; it should feel firm and set.
- The Thermometer: Use a meat thermometer to check the center. It should be around 190°F or 88°C.
Storage and Serving Suggestions

You want to keep those buns tasting fresh as long as possible. If you don’t eat them all at once, you need a plan.
- Airtight is Best: Keep them in a sealed container at room temperature for up to 2 days.
- Fridge Life: Move them to the fridge after 2 days to keep them from getting moldy.
- Reheating: A quick 10 seconds in the microwave makes them taste like they just came out of the oven.
- Serving Vibes: Pair them with a hot cup of coffee or a cold glass of milk.
Customization and Creativity
Once you master this easy chocolate bun recipe, you can start making it your own. Think of this dough as a blank canvas for your chocolatey dreams.
- Add Spice: Mix in a little cinnamon or cardamom for a warm, cozy flavor.
- Nutty Crunch: Fold in some crushed walnuts or hazelnuts with the chocolate chips.
- Glaze it Up: Drizzle some melted white chocolate over the top once they are cool.
- Share the Love: Don’t forget to take a photo and tag your favorite baking blogs online.
Baking these buns is a total blast and very rewarding. Just follow the steps, watch your temperatures, and have fun with it. You are going to be a chocolate bun master in no time! Grab your flour and let’s get baking!
FAQs
Can I substitute bread flour with all-purpose flour?
You can totally use all-purpose flour for this easy chocolate bun recipe. The buns will be a little softer and less chewy. Bread flour has more protein which helps create a stronger dough. If you use all-purpose, just be careful not to over-knead it. Your buns will still taste amazing and stay super fluffy.
What happens if I use active dry yeast instead of instant?
Active dry yeast needs a little extra love before you start mixing. You have to dissolve it in lukewarm milk for about five minutes. Wait until it gets foamy and smells like bread heaven. If it does not bubble, your yeast might be dead. Instant yeast is faster because you just dump it in with the dry stuff.
Can I make the dough ahead of time and bake it later?
You can definitely let the dough rise in the fridge overnight. This is actually a pro move for a better flavor. The cold temperature slows down the yeast but builds deep taste. Just take it out and let it reach room temperature before shaping. This makes your morning baking session way less stressful.
Why did my chocolate buns turn out dry and crumbly?
Dry buns usually happen because of too much flour or too much baking. If you measure with cups instead of a kitchen scale, you might add too much. Also, check your oven temperature to make sure it is not too hot. Adding a little extra butter can also help keep things moist. High heat kills the soft texture very fast.
Is it possible to make this recipe without an egg?
You can swap the egg for a quarter cup of unsweetened applesauce. This keeps the dough moist without changing the flavor too much. Some people also use a flax egg or plain yogurt. The texture might be slightly different but still very tasty. It is a great way to make the recipe vegan-friendly.
Can I use dark chocolate instead of milk chocolate chips?
Dark chocolate is a fantastic choice for a more intense flavor. It balances the sweetness of the dough really well. You can even chop up a dark chocolate bar into chunks. These chunks create huge pools of melted chocolate inside the bun. Milk chocolate is better if you want a classic, sweet kid-friendly treat.
How do I stop the chocolate chips from melting while kneading?
The secret is to wait until the very end to add your chocolate. If you knead them for ten minutes, the friction makes them warm and messy. You can even pop the chocolate drops in the freezer for a bit. This keeps them solid while you fold them into the dough. It ensures you get clean pockets of chocolate in every bite.
What should I do if my kitchen is very cold?
Yeast loves a warm spot to grow and do its thing. If your house is chilly, turn on your oven for one minute and then turn it off. Place the bowl inside the warm (but not hot) oven. You can also put the bowl near a sunny window or on top of the fridge. Patience is key when the air is cold.
Can I add nuts or dried fruit to the dough?
Adding chopped walnuts or hazelnuts adds a great crunch to the buns. You can also try dried cherries or cranberries for a tart kick. Just make sure to keep the total amount of add-ins around 80 grams. If you add too much, the dough might struggle to rise properly. It is fun to experiment with different textures.
Why is my dough not rising at all?
The most common reason is that the milk was too hot and killed the yeast. If the liquid is over 110°F, the yeast cannot survive. Another reason could be that your yeast is old or expired. Always check the date on the package before you start. Salt touching the yeast directly can also slow things down.
How do I get that professional shiny glaze on top?
The eggwash is your best friend for a professional bakery look. Mixing an egg yolk with a splash of cream makes it extra glossy. Brush it on very gently right before the pan goes into the oven. If you want a sweet finish, brush them with sugar water after baking. This makes them look like they came from a fancy cafe.
Can I use a stand mixer instead of kneading by hand?
A stand mixer with a kneading hook makes this job a total breeze. Start on a low speed to incorporate the flour and liquids. Then move to medium speed for about eight to ten minutes. It saves your arms from a workout and gets the dough very smooth. Just keep an eye on it so you don’t overwork the motor.
What is the best way to reheat leftovers?
Pop a bun in the microwave for about ten to fifteen seconds. This softens the bread and melts the chocolate back to life. You can also wrap them in foil and put them in a warm oven. They will taste just as good as the day you baked them. Avoid reheating them for too long or they will get tough.
Can I freeze the baked buns for later?
These buns freeze beautifully for up to three months. Wrap each bun individually in plastic wrap and put them in a freezer bag. When you want one, let it thaw on the counter for an hour. Then give it a quick zap in the microwave to warm it up. It is the perfect way to have a quick breakfast ready.
Why are my buns sticking to the baking tin?
This usually happens if you didn’t use enough grease or baking paper. Lining the tin with parchment paper is the safest way to prevent sticking. You can also rub plenty of softened butter or oil on the bottom. If they are stuck, let them cool a bit before trying to lift them. The steam helps release the bread from the sides.
How do I make the buns look perfectly round?
When you shape them, use the palm of your hand to roll them on the counter. Keep the dough tucked under itself to create tension on the top. This tension helps the bun hold its shape as it grows in the oven. If the surface is tight, the bun will stay round instead of spreading. Practice makes perfect with this technique.
Can I use cocoa powder and chocolate chips together?
Using both is the ultimate way to make a double chocolate treat. The cocoa powder dyes the dough a beautiful dark color. The chocolate chips provide those melty moments that everyone loves. This combination makes for a very rich and indulgent snack. Most people prefer this “double” version over just one or the other.
What is fresh yeast and where do I find it?
Fresh yeast comes in small refrigerated blocks and has a crumbly texture. You can usually find it in the dairy or bakery section of the grocery store. It gives a very traditional flavor but doesn’t last as long as dry yeast. If you use it, you need about three times the weight of dry yeast. It is very popular with professional bakers in Europe.
How can I make these buns extra soft like brioche?
To get a brioche-style texture, increase the amount of butter and eggs. Adding more fat interferes with the gluten and makes the crumb very tender. You might need to knead it longer because the fat makes the dough slippery. The result is a rich, buttery bun that melts in your mouth. It feels much more like a dessert than a regular bread.
Can I use honey instead of sugar?
Honey works great as a natural sweetener for this dough. It adds a nice moisture and a unique floral flavor. Use the same amount of honey as you would sugar, but reduce the milk by a tiny bit. Honey can make the crust brown faster, so keep a close eye on the oven. It is a healthy and delicious swap for white sugar.