 Skip to content
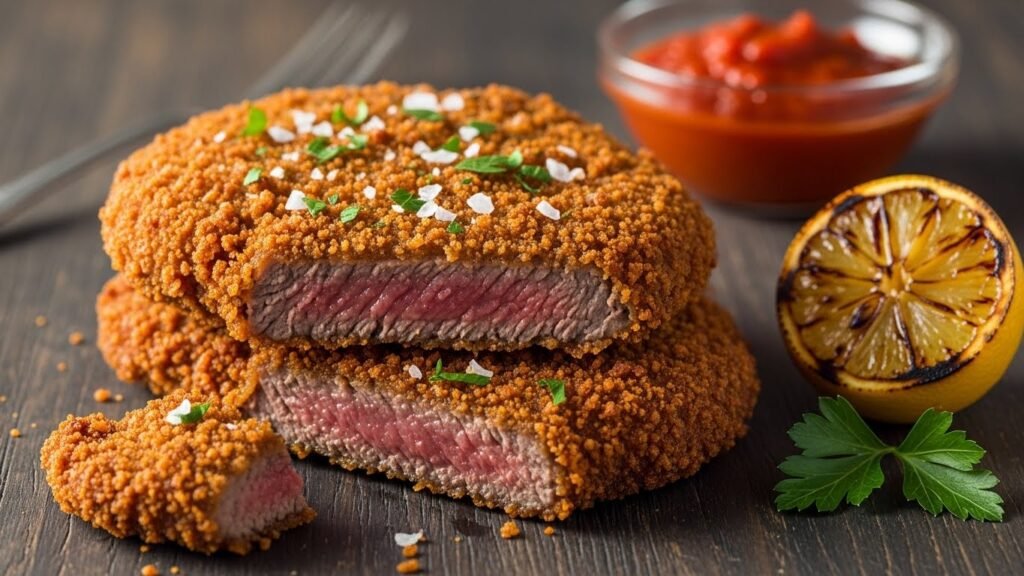
Making beef cutlets is like getting a warm hug from your grandma. It is the ultimate comfort food that hits the spot every single time. You get that perfect mix of tender meat and a super crunchy outside. It is a simple dish but it feels real fancy when you do it right. Everyone loves a good crunch when they take a bite. This guide will show you how to nail that golden crust perfectly. You will learn the secrets to keeping the meat juicy while the outside stays crispy.
Introduction to Beef Cutlets
A beef cutlet is basically a thin slice of meat that gets breaded and fried. It is a classic meal found in kitchens all over the world. The best part is how the textures play together in your mouth. You want that snap from the breading followed by soft meat. It is a quick meal that looks like you spent all day in the kitchen. People love it because it is filling and very satisfying.
To get a perfect cutlet, you need a few key things to go right. You need the right meat and a solid breading station. The heat of your oil also matters a lot. If the oil is too cold, your cutlet gets greasy and sad. If it is too hot, the outside burns before the meat even cooks. We are going to cover every little detail so you become a pro. You will be making the best beef cutlet on the block in no time.
The Global History and Variations of Breaded Beef
Breaded meat is not just an American thing; it is a global superstar. People have been frying thin meat for a long, long time. Every culture has its own spin on how to make it tasty. It is cool to see how one idea spread across the whole planet. Understanding these styles helps you appreciate the humble beef cutlet even more.
Wiener Schnitzel
The Wiener Schnitzel is the famous forefather of breaded meat from Austria. Traditionally, they use veal, but the technique is exactly the same as our beef version. It is usually served very large, often hanging off the plate. It is super thin and always served with a slice of lemon. This dish set the standard for what a crispy coating should look like. It is simple, elegant, and totally delicious.
Milanesa
In South America, the Milanesa is basically a king among comfort foods. It was brought over by Italian immigrants and became a huge hit. You can find it in Argentina, Uruguay, and many other spots. Sometimes they top it with ham, cheese, and tomato sauce. That version is called Milanesa a la Napolitana. It is a staple meal that families eat together every week.
Chicken Fried Steak
The American South took the beef cutlet and gave it a heavy twist. They call it chicken fried steak because it is cooked like fried chicken. It is usually served with a thick, peppery white gravy on top. This version is all about being big, bold, and very filling. It often uses tougher cuts of meat that get pounded until they are soft. It is a legendary breakfast or dinner choice in many states.
Bistec Empanizado
This version brings a Latin and Caribbean flair to the table. They often marinate the meat in garlic and lime before breading it. This gives the beef cutlet a bright and zesty flavor profile. It is commonly served with rice, beans, and fried plantains. The breading is usually very fine and sticks close to the meat. It shows how small changes in seasoning can change the whole vibe.
Choosing the Best Meat for Beef Cutlets
Picking the right meat is the first step to success. You do not need the most expensive steak in the shop. In fact, some of the cheaper cuts actually work better for this. You want something lean so it does not get too chewy. Since we are frying it fast, we need meat that stays tender. Here are the best choices for your next batch of beef cutlets.
- Top Round Steaks are very lean and super easy to pound out thin.
- Minute Steaks come pre-tenderized which saves you a lot of work in the kitchen.
- Eye of Round Steak is a budget-friendly pick that still packs a lot of beefy flavor.
- Flank Steak is a great choice if you cut it against the grain to keep it soft.
- Lean Cuts are important because too much fat can make the breading fall off during frying.
Essential Ingredients You’ll Need
Before you start cooking, you need to gather your squad of ingredients. Having everything ready makes the process go a lot smoother. You do not want to be searching for salt while your oil is smoking. Each ingredient has a special job to do to make the cutlet great. Use the best stuff you can find for the best results. Here is your shopping list for a killer beef cutlet.
- High-Quality Beef is the main star so make sure it looks fresh and red.
- All-Purpose Flour acts as the primer that helps the egg stick to the meat.
- Egg Wash is the essential glue that keeps your breadcrumbs from sliding off.
- Italian Seasoned Breadcrumbs give you a built-in flavor and that classic golden crunch.
- Fresh Italian Parsley adds a pop of green and a fresh taste to the crust.
- Vegetable Oil is the best for frying because it can take the heat without burning.
- Seasoning Blend of salt, black pepper, and garlic powder adds the perfect depth.
Advanced Preparation: Beyond the Mallet
Preparation is where the magic happens for a beef cutlet. You can’t just throw a thick steak in the pan and hope for the best. You have to treat the meat right before it hits the oil. This ensures every bite is tender and full of flavor. These extra steps might take a minute, but they are totally worth it. Let’s look at how to prep like a professional chef.
Pounding the Cutlets
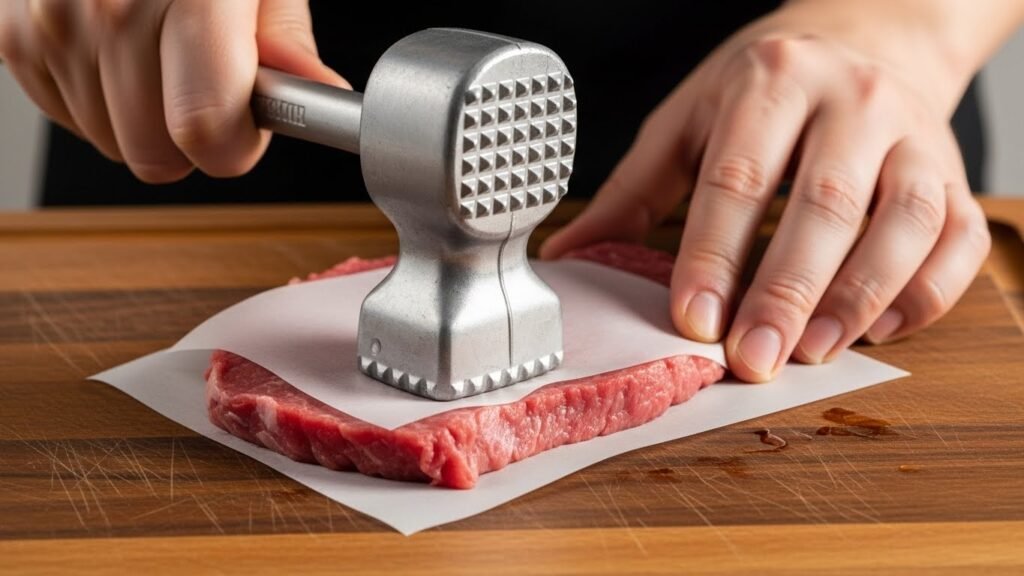
Pounding the meat is how you get that iconic thin shape. Put your meat between two pieces of parchment paper first. This keeps things clean and prevents the meat from tearing. Use the flat side of a meat mallet for the best results. Start from the center and work your way out to the edges. It is a great way to take out some stress too.
Target Thickness
You are aiming for a thickness of about 1/4 inch. This is the sweet spot for a beef cutlet. It is thin enough to cook fast but thick enough to stay juicy. If it is too thick, the breading burns before the meat is done. If it is too thin, it can get dry like a cracker. Consistency is key so try to make them all the same size.
The Science of Tenderizing
When you pound the meat, you are breaking down tough fibers. This prevents the beef cutlet from curling up in the hot pan. It also makes the meat much easier to chew once it is cooked. This process turns a cheap steak into a gourmet meal. Without tenderizing, your cutlet might end up tough and rubbery. It is a step you definitely should not skip.
Moisture Control
Moisture is the biggest enemy of a crispy beef cutlet. You must pat the meat dry with paper towels before you start. If the meat is wet, the flour will turn into a paste. That paste will make the breading slide right off in the oil. A dry surface ensures the flour sticks perfectly to the beef. This is a small trick that makes a huge difference.
Pre-Seasoning
You want to season the meat itself, not just the breading. Sprinkle salt, pepper, and garlic powder directly onto the beef. This builds layers of flavor from the inside out. Don’t be shy with the seasoning on both sides. This ensures the meat tastes good even without the crust. It is the secret to a professional-tasting beef cutlet.
The Velveting Technique
If you want crazy tender meat, try a little velveting. Just a tiny pinch of baking soda can work wonders. Rub it on the meat and let it sit for a few minutes. Then rinse it off and dry the meat thoroughly. This changes the pH levels and makes the beef super soft. It is a pro move that will impress your friends.
Setting Up a Pro-Level Breading Station
A clean breading station is the sign of a smart cook. If you set it up right, you won’t get “club hand” from all the gunk. You need a clear workflow from left to right. This keeps the mess down and the quality up. It makes the whole process feel like a fun assembly line. Follow this setup for the perfect beef cutlet coating.
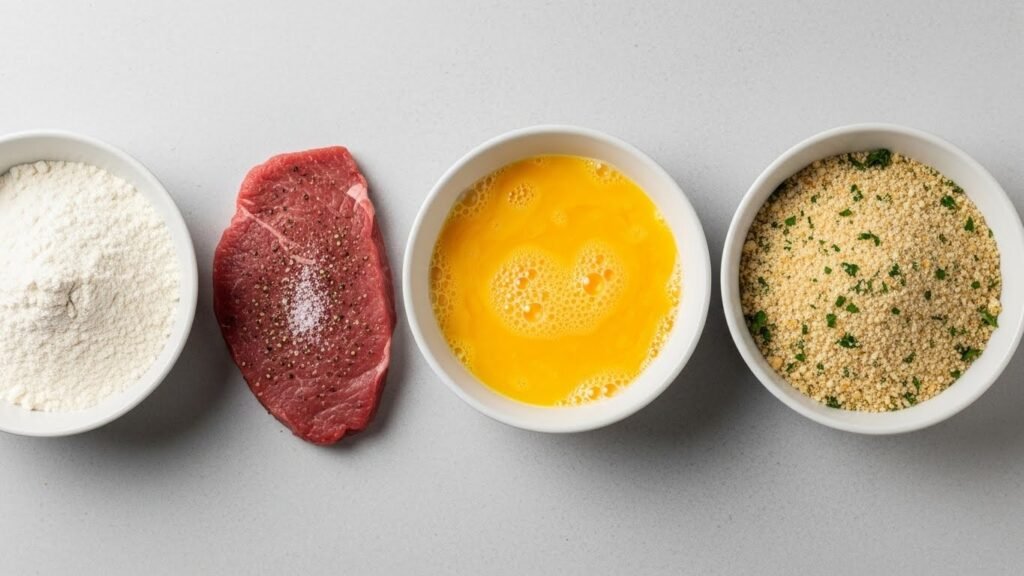
The Three-Bowl Method
You need three separate shallow bowls for this to work. The first bowl is for your all-purpose flour. The second bowl holds your whisked eggs with a splash of water. The third bowl is for your seasoned breadcrumb mixture. Move the meat from one to the next in that exact order. This layered approach is the only way to get a crust that stays put.
Mixing the Coating
Your breadcrumbs need a little extra love to be great. Mix in your fresh chopped parsley for a nice flavor boost. You can also add some dried oregano or basil if you want. Make sure the seasonings are spread evenly through the crumbs. Every inch of that beef cutlet needs to be covered in flavor. A good mix ensures no bite is ever boring.
Customizing Your Crust
You can get creative with your breading to change the texture. Adding some grated Parmesan cheese makes it extra savory and salty. Using Panko breadcrumbs will give you a much bigger, airier crunch. Some people even crush up crackers or cereal for a unique twist. Don’t be afraid to experiment with different textures. It is your kitchen, so have some fun with it.
Double-Coating vs. Single-Coating
A single coat is classic, but a double coat is for the crunch lovers. For a double coat, go from egg to crumbs and then back to egg and crumbs again. This creates a very thick and sturdy shell around the meat. It is perfect if you like a lot of breading on your beef cutlet. However, a single coat lets the flavor of the beef shine through more. Try both and see which one you like best.
The Resting Phase
After breading, let the cutlets sit on a plate for 10 minutes. This is a secret tip that many people skip. Resting allows the breading to really bond with the meat. It helps the flour and egg set so they don’t flake off in the oil. This small wait time guarantees a perfect, solid crust. It is the difference between a good cutlet and a great one.
Master the Frying Process
Frying is the most exciting part of making a beef cutlet. This is where all your hard work turns into a golden masterpiece. You need to be careful and stay focused during this stage. Hot oil can be tricky if you are not paying attention. But once you hear that sizzle, you know something good is coming. Let’s master the art of the fry.
Selecting the Right Pan
The pan you choose matters more than you think. A large, deep-sided frying pan is perfect for keeping oil splashes down. Cast iron is also a fantastic choice because it holds heat so well. You want plenty of room so you don’t feel crowded while flipping. A heavy pan prevents “hot spots” that could burn your meat. Pick a sturdy pan that you feel comfortable using.
Choosing the Right Fat
Vegetable oil is the standard because it is cheap and works well. If you want more flavor, you can try using lard or beef tallow. Clarified butter, or Ghee, gives a rich taste without burning easily. Avoid regular butter because the milk solids will burn and turn bitter. The goal is to use a fat that stays stable at high temps. Good fat makes a tasty beef cutlet every time.
Ideal Oil Temperature

You want your oil to be around 350°F before you start. If the oil is too cold, the meat will just soak it up like a sponge. This results in a greasy, heavy beef cutlet that nobody wants. If you have a thermometer, definitely use it to stay on track. Keeping a steady temperature is the key to that perfect golden color. It makes the crust crispy instead of oily.
The Wooden Spoon Trick
If you don’t have a thermometer, use a wooden spoon. Dip the handle of the spoon into the hot oil. If bubbles start dancing around the wood, your oil is ready. If it starts smoking, it is way too hot and you should turn it down. It is a simple old-school trick that works every single time. It is an easy way to feel like a pro in the kitchen.
Cooking Time
Because the meat is so thin, it cooks very fast. You only need about 2 to 3 minutes per side. You are looking for a beautiful deep golden brown color. Don’t walk away from the stove during this time. Once you flip it, the second side usually cooks even faster. Fast cooking keeps the inside of the beef cutlet nice and tender.
Internal Temperature Safety
The meat needs to hit an internal temperature of 145°F. Since it is thin, you might not be able to use a probe easily. But usually, when the crust is golden, the meat is done. If you are worried, you can cut into one to check. Safety is important, but overcooking will make it tough. With a little practice, you will be able to tell by looking.
Tips for the Crispiest Results
Everyone wants that loud crunch when they bite into a cutlet. Getting that perfect texture is all about managing moisture and heat. Even if you follow the steps, a few small mistakes can ruin the crisp. These pro tips will ensure your beef cutlet stays crunchy until the last bite. Pay close attention to these common pitfalls.
Don’t Overcrowd the Pan
Only cook two or three cutlets at a time. If you put too many in, the oil temperature will drop fast. Cold oil means the breading will absorb grease instead of frying. This makes the crust soggy and limp rather than crispy. Give each beef cutlet its own space to sizzle. It is better to cook in batches than to ruin the whole lot.
The Importance of the Cooling Process
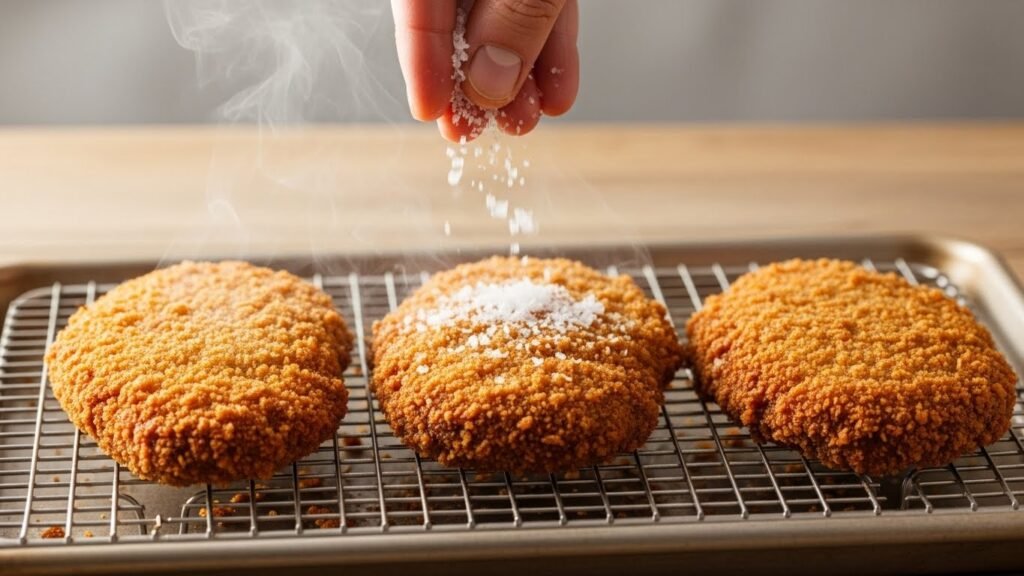
Where you put the cutlets after frying is huge. Do not put them directly onto a flat plate. The steam from the hot meat will get trapped underneath and ruin the crust. This is how you get a soggy bottom on an otherwise good cutlet. You need a setup that lets the meat breathe while it cools. Proper cooling is the final step to a perfect texture.
- The Wire Rack Method is the absolute best way to cool your meat.
- Air Circulation around the whole cutlet stops steam from making the breading soft.
- Drainage is better on a rack than on paper towels which can hold onto oil.
The Finishing Touch
As soon as the meat comes out of the oil, hit it with salt. Flaky sea salt is the best choice for this. The salt sticks to the hot oil and enhances all the flavors. A fresh squeeze of lemon juice is also a game-changer right before eating. The acid cuts through the richness of the fried breading. It makes every bite of the beef cutlet taste bright and fresh.
Here is a simple, step-by-step summary to help you make the perfect beef cutlet. This guide keeps things easy and clear so you can get cooking right away.
Step-by-Step Guide to the Perfect Beef Cutlet
Step 1: Prep the Meat
- Select your beef by choosing lean cuts like top round or minute steaks.
- Trim the fat to ensure the breading stays attached during the frying process.
- Place the meat between two sheets of parchment paper or plastic wrap.
- Pound the beef with a meat mallet until it is about 1/4 inch thick.
- Pat the meat dry using paper towels to remove all surface moisture.
Step 2: Season and Tenderize
- Sprinkle salt on both sides of every piece of meat you prepared.
- Add black pepper and garlic powder to build a solid flavor base.
- Apply baking soda if you want to use the velveting trick for extra tenderness.
- Let the meat rest for a few minutes so the seasonings can soak in.
Step 3: Organize Your Breading Station
- Bowl One should contain a generous amount of all-purpose flour.
- Bowl Two is for your eggs whisked with a tiny splash of water.
- Bowl Three holds your Italian seasoned breadcrumbs and fresh chopped parsley.
- Line them up in a row to create an easy workflow for your hands.
Step 4: Coat the Beef Cutlet
- Dredge the meat in the flour and shake off any extra powder.
- Dip the beef into the egg wash until it is fully covered.
- Press the meat into the breadcrumbs to make sure they stick well.
- Set on a plate and let the breaded cutlets sit for 10 minutes before frying.
Step 5: Heat the Oil
- Pour vegetable oil into a heavy pan until it is about 1/2 inch deep.
- Turn on the heat to medium-high and wait for the oil to get hot.
- Check the temp using a thermometer or the wooden spoon bubble trick.
- Aim for 350°F to ensure the beef cutlet gets crispy without burning.
Step 6: Fry to Golden Perfection
- Place the meat carefully into the hot oil using kitchen tongs.
- Fry for two minutes until the bottom side turns a deep golden brown.
- Flip the cutlet gently to avoid splashing any hot oil on yourself.
- Cook the other side for another two minutes until it matches the first side.
- Check the color to make sure it looks crunchy and delicious all over.
Step 7: Cool and Serve
- Move the cutlets immediately to a wire cooling rack to stay crispy.
- Add flaky salt while the oil is still wet on the surface of the meat.
- Wait three minutes before serving so the juices stay inside the meat.
- Garnish with lemon and fresh parsley to give it a professional look.
- Serve it hot with your favorite side dishes and enjoy your meal.
Alternative Cooking Methods
Frying isn’t the only way to enjoy a great cutlet. If you want to use less oil, there are other solid options. These methods are a bit healthier but still taste great. You might not get the exact same crunch as frying, but it is close. These are perfect for busy weeknights when you want less mess. Here is how to cook a beef cutlet without the big pot of oil.
How to Bake Beef Cutlets in the Oven
Preheat your oven to 400°F to get a good sear. Put a wire rack on a baking sheet and place the cutlets on top. This lets the hot air hit the bottom so they get crispy all over. Bake them for about 15 to 20 minutes until they are brown. You can spray them with a little oil to help the color. It is a hands-off way to make a big batch at once.
Air Frying Instructions
The air fryer is a fantastic tool for making a beef cutlet. Set it to 375°F and cook for about 8 to 10 minutes. You must flip them halfway through to ensure even browning. Make sure you spray both sides with a little bit of oil. This helps the breadcrumbs toast instead of staying dry and dusty. It gives you that fried taste with way less fat.
Troubleshooting Common Mistakes
Even pros have bad days in the kitchen sometimes. If your cutlet didn’t turn out perfect, don’t worry. Most problems have a very simple fix for next time. Learning from your mistakes is how you become a master cook. Here are the most common issues people face with a beef cutlet. Check these out if things aren’t going quite right.
- Why is my breading falling off? This usually happens because the meat was too wet or you didn’t use enough flour.
- Why is the meat tough? You probably didn’t pound it thin enough or you overcooked it.
- Why is the coating burning? Your oil is likely too hot or you have old crumbs burning in the pan.
- The “Soggy Bottom” Syndrome happens when you cool the meat on a flat surface instead of a rack.
Serving Suggestions and Pairings
A beef cutlet is a team player that goes with almost anything. You can keep it simple or dress it up for a fancy dinner. The side dishes help balance out the fried goodness of the meat. Think about adding something creamy or something fresh and acidic. There are no wrong answers here, just delicious choices. Here are some of the best ways to serve your masterpiece.
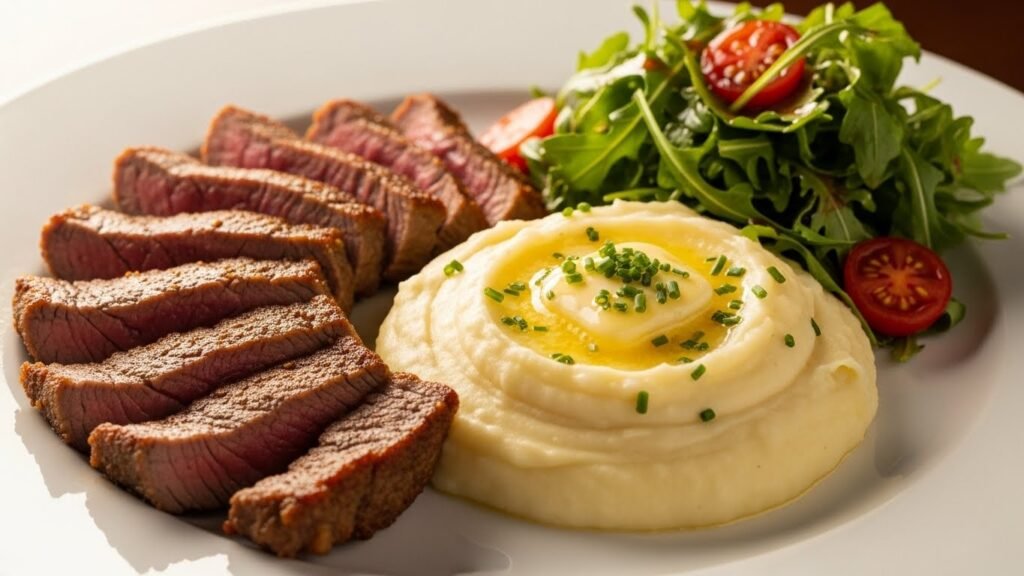
- Classic Sides like creamy mashed potatoes or buttered noodles are always a win.
- Sauce Options like a rich marinara or a spicy peppercorn sauce add a lot of flair.
- Wine Pairings like a cold Pinot Grigio or a light Red can really elevate the meal.
- Garnishing with extra parsley and lemon zest makes the plate look beautiful.
Meal Prep, Storage, and Reheating
You can totally make these ahead of time if you are busy. They are great for leftovers the next day too. The key is knowing how to store them so they don’t get gross. If you do it right, they can taste almost as good as fresh. Don’t let those extra cutlets go to waste. Follow these tips for the best leftover beef cutlet experience.
Fridge Storage
Keep your cooked cutlets in an airtight container in the fridge. They will stay fresh and safe for about 3 days. Try to put a piece of parchment paper between them so they don’t stick. The breading will naturally soften in the fridge, but we can fix that later. It is a great protein to have ready for quick lunches.
Freezing Instructions
You can freeze these either raw or cooked. To freeze raw, bread them and then put them on a tray in the freezer. Once they are frozen solid, move them to a bag. This lets you cook one at a time whenever you want. If they are already cooked, they will last about a month in the freezer. Just make sure they are wrapped tight to avoid freezer burn.
The Best Way to Reheat
Never, ever use the microwave to reheat a beef cutlet. It will turn the breading into a soggy, chewy mess. Instead, use your oven or air fryer at 350°F. This will dry out the crust and bring back that signature crunch. It only takes a few minutes to make them delicious again. This is the only way to treat a high-quality leftover.
Nutritional Information and Breakdown
It is good to know what you are eating, even with comfort food. A beef cutlet is high in protein which keeps you full. The calories mostly come from the breading and the oil used for frying. You can adjust the numbers by using different cooking methods. Here is a general look at the numbers for a standard serving.
| Nutrient | Amount per Serving |
| Calories | 532 kcal |
| Protein | 40g |
| Fat | 34g |
| Carbohydrates | 14g |
You can make it healthier by using whole wheat breadcrumbs. Air frying instead of deep-frying also cuts down on the fat significantly. Choosing heart-healthy oils like avocado oil is another smart move. Balance your plate with plenty of veggies to make it a complete meal. You can enjoy a beef cutlet and still feel good about your choices.
Conclusion: Mastering the Art of the Cutlet
Making a perfect beef cutlet is a skill that will serve you for life. It is a dish that brings smiles to everyone at the table. Once you learn the basics, you can start making it your own. Try different spices or different types of meat to see what you like. The more you do it, the better your technique will get.
Don’t be afraid to get your hands a little messy in the kitchen. The reward is a plate of hot, crispy, and delicious food. It is a simple pleasure that never gets old. Now you have all the tools and tips to be a cutlet master. Grab your apron and get that oil heating up. Your best beef cutlet is just a few minutes away!
Frequently Asked Questions
What is the best way to slice a larger roast into cutlets?
If you are starting with a large piece of meat like a top round roast, place it in the freezer for about 30 to 45 minutes until it is firm but not frozen. This makes it much easier to slice consistent, thin pieces against the grain before you begin the pounding process.
Can I use milk instead of eggs for the breading station?
While eggs provide the strongest bond, you can use heavy cream or whole milk as a substitute. However, the breading may be slightly more prone to flaking off. To improve results with a dairy wash, let the floured meat soak in the liquid for a minute before moving it to the breadcrumbs.
Is it possible to make these beef cutlets gluten-free?
Yes, you can easily adapt this recipe by using a gluten-free all-purpose flour blend and certified gluten-free breadcrumbs or crushed pork rinds. The frying process remains exactly the same, and the crunch factor is often just as satisfying.
How do I prevent the meat from curling up while frying?
Meat curls when the connective tissues shrink faster than the muscle. To prevent this, make small, shallow cuts (nicks) around the edges of the cutlet about an inch apart. This allows the meat to expand and stay flat in the pan.
What kind of salt is best for the final seasoning?
While table salt works, a flaky sea salt or Kosher salt is superior for the finishing touch. The larger crystals provide a nice textural contrast and a burst of flavor that doesn’t immediately dissolve into the crust.
Can I prepare the breaded cutlets a day in advance?
You can bread the cutlets and store them in the refrigerator overnight. Place them on a tray with parchment paper between layers and cover them tightly. This actually helps the breading set firmly, though you may need to give them a quick press into some fresh crumbs if they look damp before frying.
What is the difference between a beef cutlet and a country fried steak?
A beef cutlet usually refers to a thin, breaded, and pan-fried steak often associated with Italian or European styles. Country fried steak is an American variation that is typically more heavily battered and served specifically with brown or white gravy.
How many times can I reuse the frying oil?
If the oil hasn’t smoked or turned very dark, you can strain it through a fine-mesh sieve or coffee filter and reuse it once or twice. Store it in a cool, dark place. However, for the cleanest flavor and best golden color, fresh oil is always recommended.
Can I use a cast iron skillet for frying beef cutlets?
Absolutely. Cast iron is excellent for this dish because it retains heat very well. Once the oil reaches the target temperature, the heavy metal helps keep it steady even when you add the cold meat, resulting in a more even fry.
Why did my cutlets turn out grey instead of brown?
This usually happens if the oil wasn’t hot enough or if the pan was too crowded. Instead of frying, the meat essentially “steams” in its own juices. Ensure the oil is shimmering and bubbly before adding the beef.
What are some good herbs to add to the breading besides parsley?
Dried oregano, thyme, and rosemary are classic additions that pair beautifully with beef. For a bit of heat, you can also mix in some red pepper flakes or a pinch of cayenne pepper into the breadcrumb bowl.
Should I cover the pan with a lid while frying?
Never cover the pan when frying breaded items. A lid traps steam, which will fall back into the oil and onto the meat, making the breading soggy and causing the oil to splatter dangerously.
Can I use a deep fryer instead of a pan?
Yes, a deep fryer works well and offers precise temperature control. Since the cutlets are thin, they will float to the top very quickly. Just be sure not to submerge too many at once to keep the oil temperature stable.
What is the best way to tenderize without a meat mallet?
If you don’t have a mallet, you can use the bottom of a heavy skillet, a rolling pin, or even a sturdy glass jar. Just be sure to keep the meat covered in plastic wrap to prevent tearing the fibers.
How do I know if my oil has reached the “smoke point”?
You will see thin wisps of bluish-grey smoke rising from the surface. If this happens, the oil is too hot and will give the meat a burnt, bitter taste. Remove the pan from the heat immediately and let it cool down before proceeding.
Can I use Panko breadcrumbs for a beef cutlet?
Panko is a great choice for a lighter, airier crunch. Because Panko flakes are larger, you may want to press them firmly into the meat or even pulse them in a blender for a second to create a mixture of fine and coarse crumbs for better coverage.
Why is it important to cut against the grain?
The “grain” refers to the direction the muscle fibers run. By cutting across these fibers, you shorten them, which makes the meat much easier to bite through. Cutting with the grain results in a stringy, tough cutlet.
Can I use butter for frying if I want a richer flavor?
Plain butter has a low smoke point and will burn quickly. If you want that buttery flavor, use a mixture of half oil and half butter, or use clarified butter (ghee), which can handle the high heat required for frying.
How do I get a thick, “puffy” crust like some restaurants?
To get a puffier crust, you can add a teaspoon of baking powder to your flour bowl. Additionally, make sure your egg wash is well-whisked and frothy; this creates tiny air pockets that expand when they hit the hot oil.
What should I do if the breading is browning too fast?
If the outside is getting dark but you’re worried the meat isn’t cooked, turn the heat down immediately and add a small splash of room-temperature oil to the pan to lower the temperature. You can also finish the cutlets in a 300°F oven for a few minutes.