Skip to content
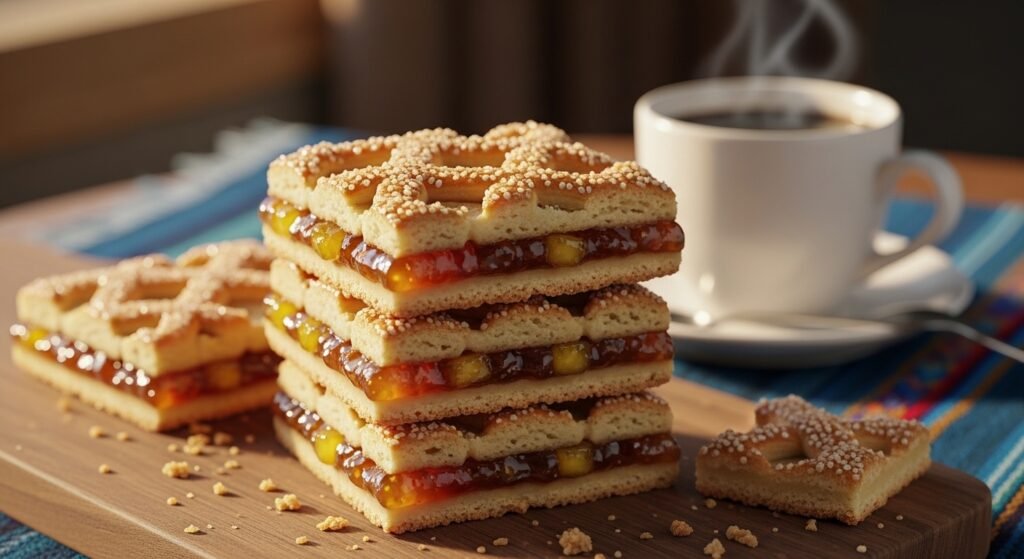
Are you ready to try the best treat from Central America? These Salvadoran cookies are also known as Semita de Piña. They are a staple in every bakery in El Salvador. Imagine a buttery crust that melts in your mouth. Now add a thick layer of sweet pineapple jam in the middle. That is exactly what you get with this recipe. It is the perfect mix of crunchy and chewy. You will love how easy it is to make these at home. These cookies are great for parties or a quiet snack. Let’s dive into the world of Salvadoran baking together.
Introduction to Salvadoran Cookies
Salvadoran cookies or Semita de Piña are very special. They are not like your average chocolate chip cookie. These treats are more like a shortbread sandwich. The dough is rich and buttery. It holds a sweet and tangy pineapple filling. People in El Salvador eat them all the time. You can find them in big cities and small villages. They are a true symbol of Salvadoran comfort food.
The culture of “Pan Dulce” is huge in El Salvador. Pan Dulce means sweet bread. Salvadoran cookies fall right into this category. People usually buy them fresh from a local “panaderia” or bakery. The smell of baking sugar and pineapple fills the air every afternoon. It is a tradition that brings families together. You can’t visit El Salvador without trying a piece.
There are two main styles of this pastry. The first is Semita Alta. This version is thick and soft like a cake. The second is Semita Pacha. Pacha means flat or thin in Spanish. This version is crispier and looks more like a tart. Our recipe focuses on the cookie-style version. It gives you the best of both worlds.
In El Salvador, the “cafecito” is a daily ritual. This is a coffee break that happens in the late afternoon. Salvadoran cookies are the star of this break. People dip the cookies into hot black coffee. The heat from the coffee softens the buttery crust. It makes the pineapple flavor really pop. You have to try it this way at least once.
Historical and Cultural Context
The history of semita goes back a long time. It started with European baking techniques brought to Central America. Over time, locals added their own twist. They used ingredients that grew nearby. Pineapple was the perfect choice for the filling. It grew abundantly in the tropical climate of El Salvador. This created a unique fusion of flavors.
Pineapple became the signature filling because of its sweetness. In the past, people made the jam by hand. They would cook fresh pineapples with raw sugar for hours. This traditional method gave the filling a deep color. It also made the flavor very concentrated. Today, we still aim for that same rich taste. It is what makes Salvadoran cookies stand out.
Old-fashioned baking was done in wood-fired ovens. These ovens gave the crust a slightly smoky flavor. They also created a very uneven but beautiful golden crust. Modern kitchens use electric or gas ovens now. However, the goal remains the same. We want a perfectly baked golden top. We also want a bottom that is cooked all the way through.
Every region in El Salvador has a favorite version. Some areas like their semita very sweet. Other places might add a bit of ginger to the jam. Some bakers use a lot of cinnamon in the dough. Despite these small changes, the heart of the recipe stays. It is always about the balance of fruit and bread. It is a recipe passed down through generations.
Essential Ingredients

The Foundation: The Dough
- 4 cups All-purpose flour is the base of the dough. You should sift it to make the cookies light.
- 1 cup Granulated sugar provides the perfect amount of sweetness. You can use a little less if you prefer.
- 1 cup (2 sticks) Unsalted butter must be softened first. This ensures it mixes perfectly with the sugar.
- 2 Large eggs help bind everything together. Make sure they are at room temperature.
- 1 tsp Baking powder gives the dough a little bit of lift. It keeps the crust from being too hard.
- 1/2 tsp Salt is essential for the best flavor. It balances out all the sugar in the recipe.
- 1 tsp Vanilla extract adds a lovely aroma to every bite. You can use almond extract for a different vibe.
The Heart: The Pineapple Filling
- 1.5 cups Pineapple jam or preserves is the star ingredient.
- Texture matters because the jam needs to be thick. Runny jam will soak into the dough and make it mushy.
- Flavor boost can be achieved by adding a pinch of cinnamon. This adds a warm spice to the tropical fruit.
The Finish: Topping and Glaze
- 1 Large egg is needed for the final egg wash.
- 1 tbsp Water or milk helps thin the egg wash out.
- Sugar topping can be sprinkled on top for a nice crunch. Use turbinado sugar if you want big crystals.
Recommended Kitchen Tools
- A 9×13 inch baking pan is the standard size for this recipe. Metal pans usually give a crispier edge.
- A rolling pin is necessary to get the dough flat and even.
- Parchment paper makes it so much easier to lift the cookies out.
- A pastry brush allows you to apply the egg wash evenly.
- A cooling rack prevents the bottom from getting soggy after baking.
Detailed Preparation Process
Mixing the Perfect Shortbread Dough

First, you need to cream the butter and sugar. Use a mixer or a wooden spoon. You want the mixture to look pale and fluffy. This step incorporates air into the fat. It is the secret to a melt-in-your-mouth texture. Do not rush this part of the process. It should take about three to five minutes.
Next, add the eggs one at a time. Mix well after each egg is added. Then, pour in your vanilla extract. If the mixture looks a bit curdled, don’t worry. It will smooth out once you add the flour. Using room temperature eggs helps prevent this. It makes the batter much smoother.
Now, whisk your flour, baking powder, and salt in a bowl. Slowly add these dry ingredients to the butter mixture. Stop mixing as soon as the flour disappears. Overmixing will make the cookies tough. You want a soft dough that feels like playdough. It should not be overly sticky to your fingers.
Handling and Chilling the Dough
Resting the dough is a very important step. It allows the flour to fully hydrate. It also lets the gluten in the flour relax. If you skip this, the dough might shrink in the oven. Wrap the dough in plastic wrap before resting. Let it sit on the counter or in the fridge. This makes the rolling process much easier later.
If your kitchen is warm, the dough might get too soft. Refrigerate it for about 30 minutes if this happens. Chilled butter makes the dough firmer. This helps you roll it out without it tearing. If it gets too hard in the fridge, let it sit out for ten minutes. You want it pliable but cool.
If the dough sticks to your rolling pin, use a little flour. You can also roll it between two sheets of parchment paper. This trick keeps your counters clean. It also prevents you from adding too much extra flour. Too much flour can make the cookies dry. Keep the thickness as even as possible for even baking.
Assembly and Layering Techniques
Creating the Base Layer
Divide your dough into two equal pieces. Take the first piece and roll it into a rectangle. It should be the size of your 9×13 pan. Carefully lift the dough and press it into the bottom. Make sure it reaches all the corners. Use your fingers to even out any thick spots.
You can also use a small glass to roll the dough inside the pan. This helps get it perfectly flat. Once the bottom layer is in, use a fork to prick it. This is called docking. It lets steam escape while the cookies bake. This keeps the bottom layer from puffing up too much. It ensures a flat and stable base for your jam.
Spreading the Pineapple Filling
Now it is time for the pineapple jam. Scoop the jam onto the center of the dough. Use a spatula to spread it toward the edges. Try to keep the layer of jam very even. This ensures every bite has the same amount of fruit. It makes the final product look very professional.
Leave a tiny border around the edges of the pan. This prevents the jam from touching the metal directly. If jam touches the hot pan, it might burn. Burnt jam can taste bitter and stick to the pan. A small border of dough keeps everything contained. It makes cleanup a lot easier for you too.
The Top Layer and Traditional Lattice Work

For the top layer, you have two choices. The first choice is a solid sheet of dough. Roll out the second piece of dough and lay it on top. Pinch the edges to seal the jam inside. This is the fastest way to finish your Salvadoran cookies. It results in a very clean and simple look.
The second choice is the traditional lattice method. Cut the rolled dough into long strips. Lay them diagonally across the jam. Then, lay another set of strips in the opposite direction. This creates a beautiful diamond pattern. It is the classic look for semita in El Salvador. It takes more time but looks amazing.
The Baking Phase
Preparing the Oven
Preheat your oven to 350°F before you start assembling. A hot oven is key for the right texture. If the oven is too cold, the butter will melt too fast. This can cause the cookies to spread or get greasy. Check your oven with a thermometer if you can. Accuracy is very important for baking success.
Place the baking rack in the middle of the oven. This allows the heat to circulate around the pan. It helps the bottom and top cook at the same rate. If you put it too high, the top will burn. If it is too low, the bottom might get too dark. The middle rack is always the safest bet.
Applying the Finishes
Whisk your egg with a little water or milk. Use your pastry brush to coat the top dough lightly. This egg wash creates a beautiful shine. It also helps the sugar topping stick. Be careful not to let the egg wash pool in the corners. A thin, even coat is all you need.
After the egg wash, sprinkle on some extra sugar. This adds a nice crunch to the crust. Traditional Salvadoran cookies often have a visible layer of sugar. It glitters under the lights and looks very tasty. You can also add a tiny sprinkle of cinnamon here. It adds a wonderful smell to your kitchen.
Timing and Visual Cues
Bake the cookies for 30 to 35 minutes. Every oven is a little bit different. Start checking them at the 25-minute mark. You are looking for a beautiful golden-brown color. The edges should be a slightly darker brown. The center should feel firm when you press it lightly.
Don’t be afraid to leave them in for an extra minute if they look pale. A pale crust can be soft or doughy. A golden crust has the best flavor and crunch. Once they look right, take them out immediately. The pan will stay hot and continue cooking them slightly. This is called carryover baking.
Cooling and Slicing Perfection
Resist the urge to cut them while they are hot. The jam is like molten lava right out of the oven. It needs time to firm up as it cools. If you cut them too early, the jam will run out. The crust might also crumble and fall apart. Patience is the hardest part of this recipe.
Let the pan sit on a cooling rack for at least an hour. Once the pan is cool to the touch, you can slice them. Use a sharp knife to cut them into squares. You can make them big or small depending on your mood. For a party, small bite-sized squares are great. For a snack, a larger bar is perfect.
If the cookies stick to the knife, wipe it with a damp cloth. A clean knife makes much neater cuts. You can also lift the whole block out using the parchment paper. Then, slice them on a cutting board. This gives you more room to make straight lines. Your Salvadoran cookies will look like they came from a bakery.
Expert Tips for the Best Salvadoran Cookies
- The Tapa Technique involves making the top layer very thin. This makes the crust extra crispy against the jam.
- Thicken your jam by simmering it on the stove for ten minutes. Do this if your jam feels too watery.
- Use real butter for the best flavor every time. Margarine just doesn’t have the same rich taste.
- Authentic flavor can be achieved by using lard instead of butter. This is how many traditional bakers do it.
- Add lemon zest to the dough for a fresh citrus kick. It goes perfectly with the pineapple filling.
Serving Suggestions and Pairings

The best way to eat these is with hot coffee. Salvadoran coffee is world-famous for its quality. The bitterness of the coffee cuts through the sweetness of the jam. It is a match made in heaven. If you don’t like coffee, try hot chocolate. A warm cup of tea also works very well.
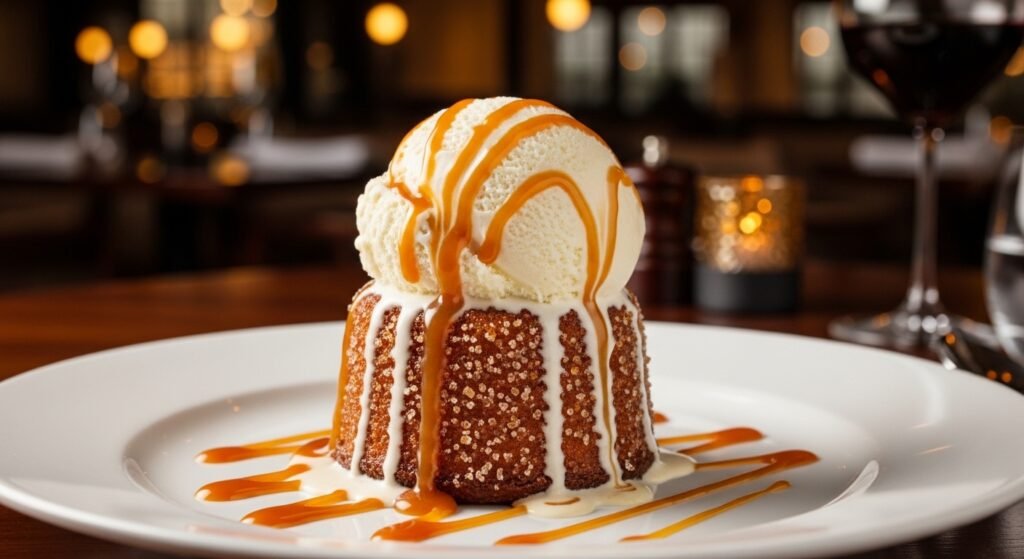
You can also serve these with Leche Poleada. This is a creamy Salvadoran vanilla custard. A square of semita with a dollop of custard is a fancy dessert. It is perfect for a dinner party. You can even warm the cookie slightly before serving. This makes the jam soft and the crust fragrant.
For a holiday gathering, pile the squares on a platter. Decorate the plate with fresh pineapple slices. You can also dust them with a little powdered sugar. They look beautiful and festive on any table. People will love the unique flavor of these cookies. They are always a conversation starter.
Storage and Preservation
Store your cookies in an airtight container. They stay fresh at room temperature for up to five days. Make sure the container is sealed tight. This prevents the crust from getting stale or soft. They actually taste even better the second day. The flavors have more time to meld together.
You can also freeze these cookies for later. Wrap individual squares in plastic wrap. Then, place them in a freezer bag. They will stay good for up to three months. This is great for meal prepping your snacks. You can just grab one and let it thaw. It will taste just as good as the day you made it.
To refresh a stale cookie, use the oven. Put it in at 300°F for about five minutes. This brings back the crunch of the crust. It also warms up the pineapple jam. Do not use the microwave if you can avoid it. Microwaves can make the dough chewy instead of crispy. The oven is always better for reheating.
Troubleshooting Common Issues
If you get a soggy bottom, check your jam. It might have been too watery. Next time, try pre-baking the bottom crust for five minutes. This creates a barrier before you add the jam. Also, make sure your oven is hot enough. A cold oven leads to longer baking times and sogginess.
If your top layer cracks, don’t panic. This usually happens if the dough is too cold. Or, it might be rolled too thin. You can patch cracks with tiny pieces of extra dough. Once the egg wash and sugar are on, nobody will notice. It gives the cookies a rustic, homemade look.
If the cookies are too sweet, reduce the sugar in the dough. You can also look for a “low sugar” pineapple preserve. Some people add a squeeze of lime juice to the jam. This adds acidity and cuts down on the sugary taste. Baking is all about finding the balance that you love.
Conclusion
Making Salvadoran cookies is a fun kitchen adventure. You get to learn about a beautiful culture through food. These cookies are more than just a sweet treat. They are a piece of Salvadoran history. The combination of butter and pineapple is truly classic. You will find yourself making these over and over again.
Don’t be afraid to experiment with the recipe. You can try using guava jam for a different taste. Some people even use dulce de leche as a filling. However, the pineapple version will always be the original favorite. It is the one that reminds people of home. It is the one that defines the Salvadoran bakery.
Now it is your turn to bake. Gather your ingredients and get started today. Your house will smell like a tropical paradise. Your friends and family will be so impressed. These Salvadoran cookies are sure to become a new favorite in your home. Enjoy every buttery, fruity bite!
FAQs About Salvadoran Cookies
Can I use brown sugar instead of granulated sugar in the dough?
You can use brown sugar if you want a deeper molasses flavor. It will make the cookies slightly softer and darker in color. Granulated sugar is more traditional for that classic crisp shortbread texture.
How do I prevent the pineapple jam from bubbling over the sides?
Make sure to leave a half-inch border of dough around the edges. You can also pinch the top and bottom layers together firmly. This creates a seal that keeps the jam inside the pastry where it belongs.
Is it possible to make Salvadoran cookies without eggs?
Yes, you can use a commercial egg replacer or a quarter cup of unsweetened applesauce per egg. The texture might be a bit more crumbly. The egg wash on top can be replaced with a brush of heavy cream or melted butter.
What kind of flour is best if I don’t have all-purpose flour?
Pastry flour is a great alternative because it keeps the cookies very tender. Avoid using bread flour for this recipe. High protein bread flour will make the dough too stretchy and the final cookie too tough.
Can I add nuts to the pineapple filling?
Adding crushed walnuts or pecans to the jam layer is a delicious twist. It adds a nice crunch that contrasts with the soft fruit. Just make sure the nuts are finely chopped so the top layer of dough stays flat.
How do I know if my pineapple jam is thick enough?
If you put a spoonful of jam on a plate and it runs, it is too thin. You want it to hold its shape when dropped from a spoon. If yours is watery, simmer it on low heat until the extra moisture evaporates.
Why did my cookies turn out dry and crumbly?
This usually happens if you measure the flour by scooping the cup into the bag. That packs the flour down and you end up with too much. Always spoon the flour into the measuring cup and level it off with a knife.
Can I make the dough a day in advance?
The dough actually improves if you leave it in the fridge overnight. This allows the flavors to develop and the gluten to relax completely. Just let it sit at room temperature for twenty minutes before you try to roll it out.
What is the best way to clean a pan with burnt pineapple jam?
Soak the pan in hot soapy water for at least thirty minutes. If the jam is really stuck, sprinkle some baking soda over the area and add a splash of vinegar. The fizzing action will help lift the burnt sugar without scrubbing.
Can I use a food processor to mix the dough?
A food processor is excellent for cutting the butter into the flour quickly. Pulse the dry ingredients with the cold butter until it looks like coarse sand. Then, add the eggs and vanilla and pulse just until a ball of dough starts to form.
Should I grease the baking pan or use parchment paper?
Parchment paper is the superior choice because it prevents sticking and helps with cleanup. If you don’t have any, grease the pan heavily with butter and a light dusting of flour. This ensures you can lift the squares out without breaking them.
Is there a gluten-free version of Salvadoran cookies?
You can substitute the all-purpose flour with a high-quality gluten-free 1-to-1 baking blend. Make sure the blend contains xanthan gum to help hold the dough together. The texture will be slightly different but still very tasty.
Can I add spices to the cookie dough itself?
While the jam usually has the spice, adding a half teaspoon of ground ginger or cardamom to the dough is wonderful. It gives the pastry a sophisticated flavor profile. Just be careful not to overpower the delicate taste of the butter.
How can I make the lattice top look perfect?
Use a pizza cutter and a ruler to get perfectly straight strips of dough. If the strips break when you lift them, pop the rolled-out dough into the freezer for five minutes. Cold dough strips are much easier to handle and weave.
Why do some recipes call for “manteca” instead of butter?
Manteca is the Spanish word for lard, which was the traditional fat used in El Salvador. Lard produces an incredibly flaky crust that stays soft for a long time. You can use half lard and half butter for a mix of flavor and texture.
Can I bake these in a convection oven?
If you use a convection oven, reduce the temperature to 325°F. The fan in a convection oven circulates heat faster, which can cause the sugar on top to burn before the middle is cooked. Keep a close eye on them during the last ten minutes.
What is the difference between Semita and Semita de Piña?
Semita is the general name for this type of bread or pastry in Central America. De Piña specifies that the filling is pineapple. You might also find Semita de Guayaba (guava) or Semita de Leche (milk custard).
Can I use a different shape than squares?
You can use a round tart pan if you want a more elegant presentation. You can even use cookie cutters to make individual round sandwiches. Just remember that smaller shapes will bake much faster than a full pan.
How do I store these if I live in a very humid climate?
Humidity can make the crust soft and sticky very quickly. In a humid area, it is best to store the cookies in the refrigerator. This keeps the jam stable and preserves the crispness of the buttery dough.
Why do I need to sift the flour?
Sifting removes any lumps and aerates the flour, which leads to a more delicate crumb. It also makes it easier to incorporate the flour into the butter mixture without overworking the dough. It is a small step that makes a big difference.